I love foundation piecing for so many reasons. It’s fast, easy, very accurate, and you can start sewing almost immediately. You can make something super complex, or really simple. The versatility is amazing to me! I love it… now. It was not always so!
The very first time I tried foundation piecing I cut out all of my pieces in advance allowing for ‘plenty’ of seam allowance and play room. I had done my research. I ‘knew’ what I was supposed to be doing.
Or so I thought, disaster came next! It took forever to cut all of the pieces. When I went to sew them, I ended up spending most of my time seam ripping because my ‘plenty’ of extra fabric was suddenly not nearly enough! The only shapes I could manage to get right were perfect squares or triangles that had a 90 angle. But I didn’t want to do those types of quilts. If I wanted squares and HSTs I would have stuck with the traditional piecing methods. I wanted complex!
So I gave up. Foundation piecing just wasn’t for me. Fine. Lots of people hate it anyway, I was just going to be one of those people.
But I kept wanting to design quilts that had a certain look. I wanted sharp points, weird angles, and something that looked complex. I couldn’t do that with traditional piecing. So I had to try again.
For my next attempt I cut my pieces much larger. I again dreaded the whole cutting process. (I think we all have parts we love and hate about the quilting process. I don’t enjoy cutting fabric. I want to get started with the sewing. I want instant progress.) But I did it. All of my pieces were neatly stacked and super organized. Whew. Everything worked quite nicely. Except my pile of waste scraps was massive. I had only made a small block. Multiply that one block by a whole quilt and I would have wasted an incredible amount of fabric. This wasn’t going to work.
I can be a bit on the cheap side at times. It’s not that I don’t spend money on things I like… but spending money on fabric to just throw so much away isn’t something I want to do. I’d rather waste the money on fabric yardage that just sits in my studio for years without being touched than wasting it on fabric that I’m throwing away. There’s probably not much difference when you really boil it down, but either way I once again wasn’t a fan of foundation piecing.
Then one day as I was about to give it one more shot, I decided to try something new. (It was new to me at least, and maybe if I had attempted to research a bit I could have found someone who uses this same method. I’m sure it’s not really ‘new,’ nothing ever is, but I haven’t seen anything really like it.) So here is exactly how I cut my fabrics for all of those weird angles. I rarely have to seam rip for my fabric not covering. I seam rip for other reasons of course, but my fabric always covers the section it should these days. And I can start sewing almost immediately after my patterns are cut. Bonus!
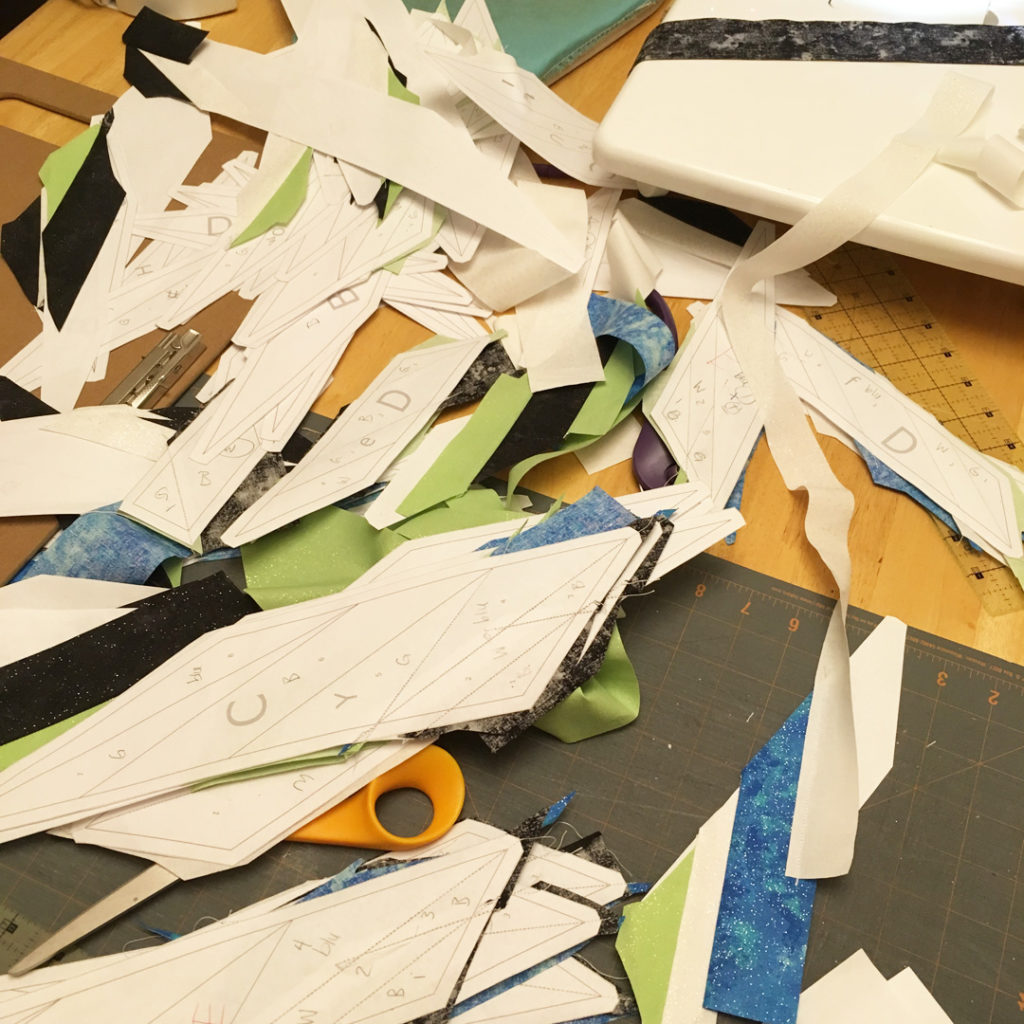
Let’s get into the pictures! First I’ll show a picture of the way I work. I’m an artist at heart, a chaotic mess of one at times! I don’t really love organization in my studio while working. This is a very typical photo of the way I work. I can only do this because I don’t have to keep all of my precut pieces in a perfect order. I just grab the right size strip and sew, toss it to the ‘needs ironed’ pile, and repeat!
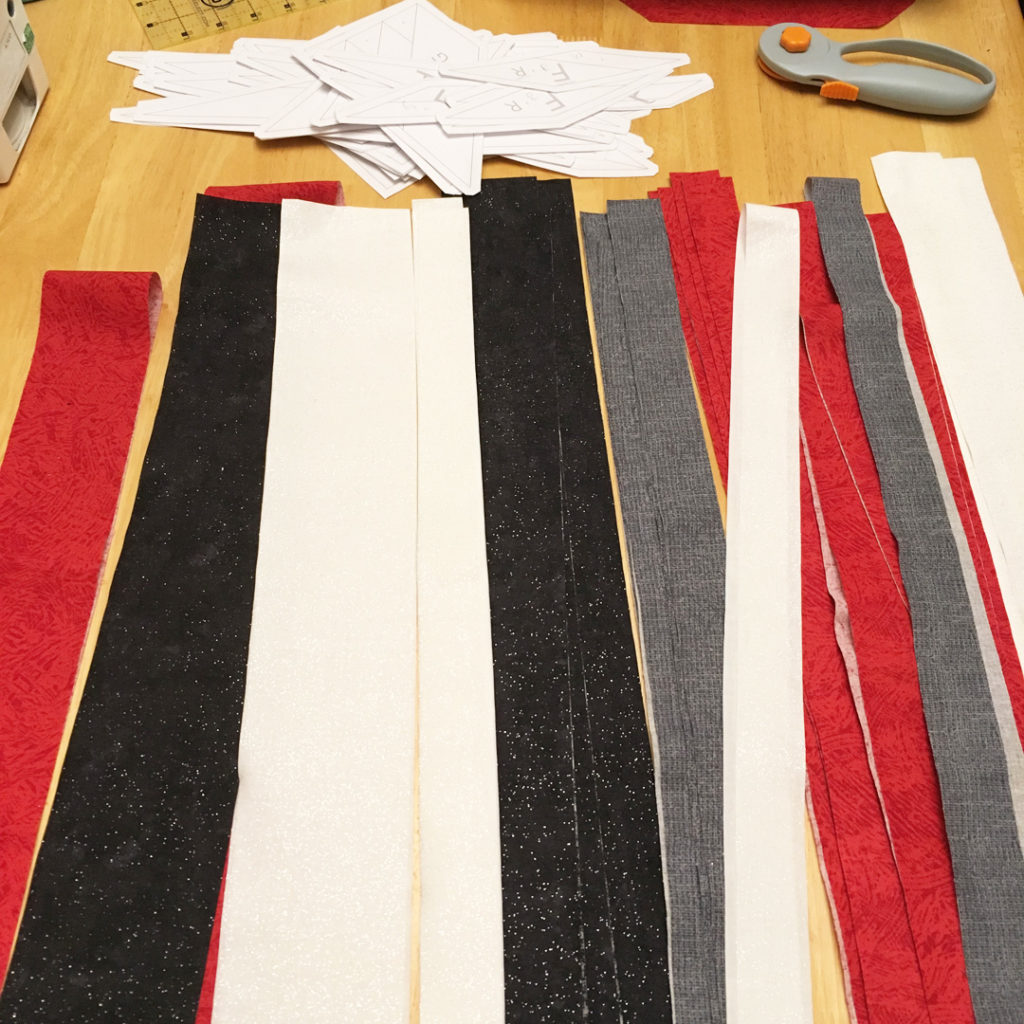
The first step is cutting the strips. Here are a set of strips from a previous quilt all laid out neatly. (I don’t normally cut this many pieces at once, but I had already completed a quarter of the design and had a pretty strong grasp on exactly what size and quantity of strips I was going to need to do the rest. Plus it made a pretty picture!)
But how wide do you make your strips? Good question!
A little attention is needed for this step or you’ll be pulling your hair out later! Get out your clear ruler and line it up on the line you’re going to sew on. Always, always (!!) measure from the line you’re going to sew on. Reread that and make sure you understand that part, it’s very important. Otherwise you will end up having a weird angle and it will not be as easy, can certainly be done, but we’re going for easy on this one!
My ruler is lined up on the line I’m going to sew. My sewing line is on the 1/4 inch line on my ruler, because we’re accounting for seam allowance.
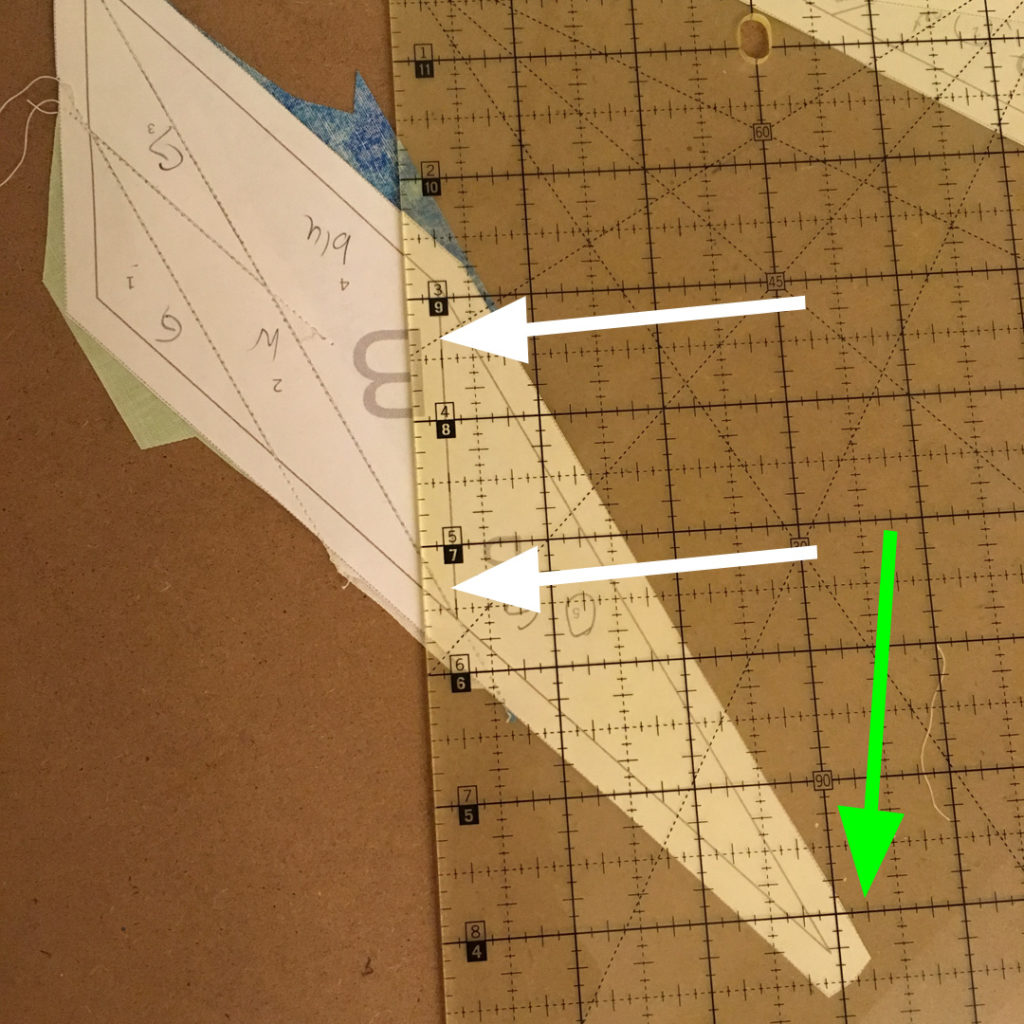
The green arrow shows how big my piece needs to be. It measures at 3 1/4 inches. That’s the MINIMUM width of my fabric strip. Now, I’ve been doing this enough times that I’ll cut it exactly there. If you are new to foundation piecing or this method, add some extra! This will give you play room on both sides until you get confident with the method.
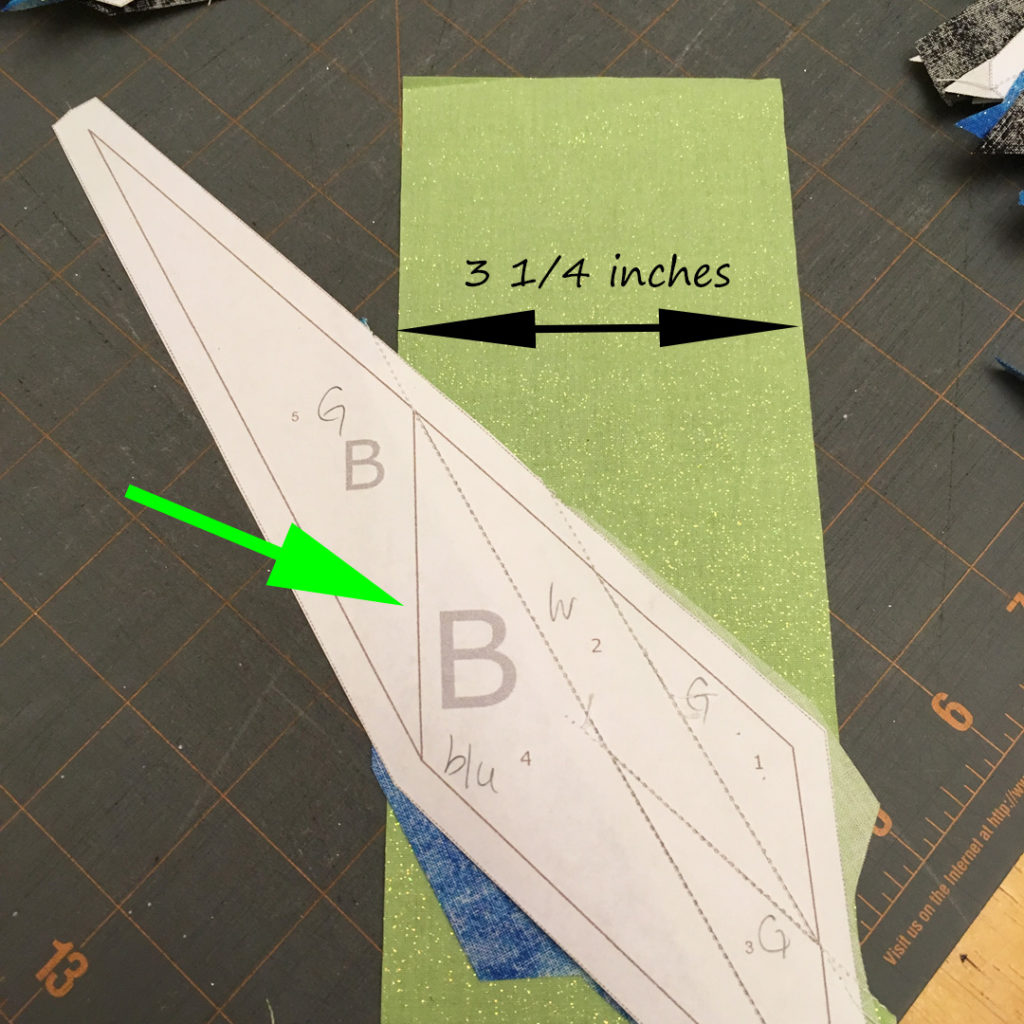
Now I’m going to line up my piece. The green arrow shows the area of my seam allowance. Take note that the top of my piece isn’t at the top of the fabric. I need it to cover the top of the triangle when it’s flipped over. Carefully take this to the sewing machine and sew along the line. (You can pin if you’d like, but I rarely do unless it’s a very long section. )
Sewn! Fold the fabric over and double check to make sure the piece is completely covered. Perfect! Trim the strip. I like to leave a pinch of extra here, it hasn’t been ironed yet and I want to give a slight bit of play room.
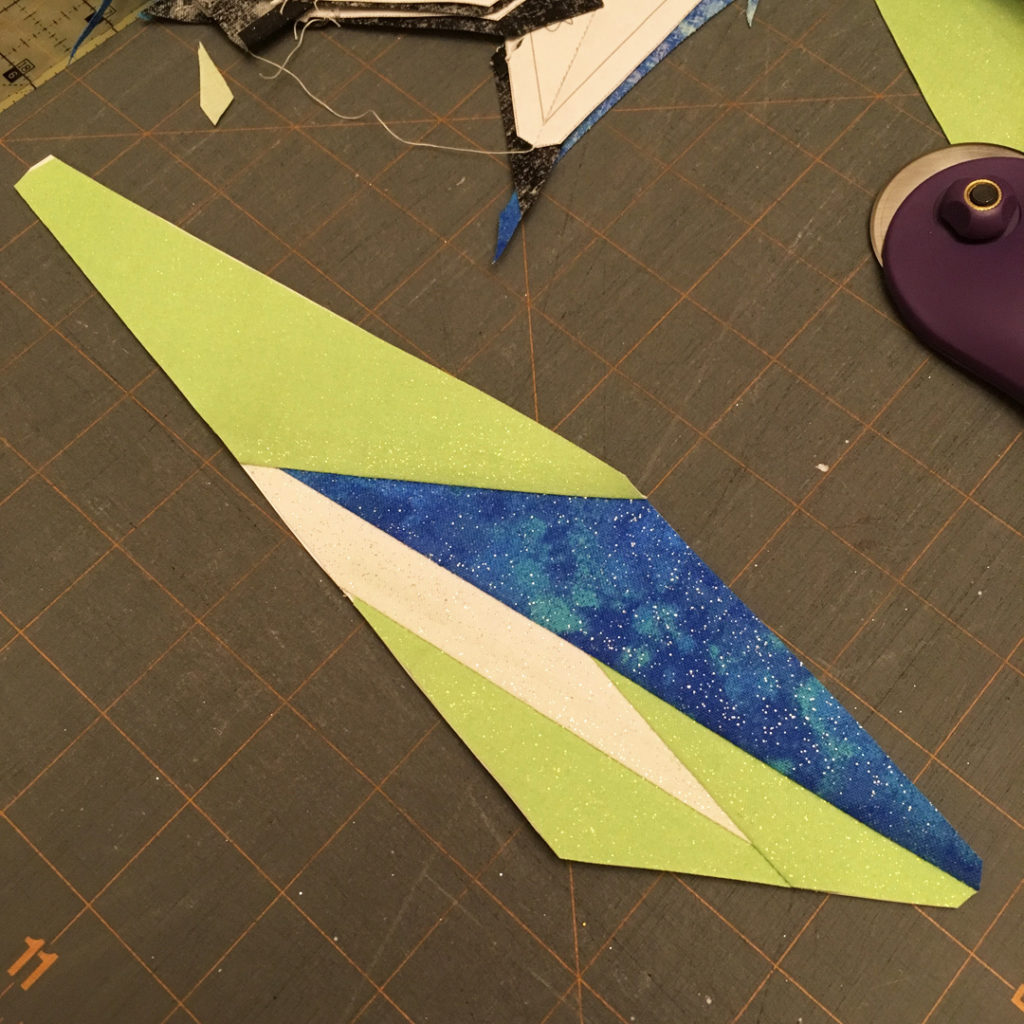
Below is the ironed version. (I did trim the seam allowance along that line before I pressed it!)
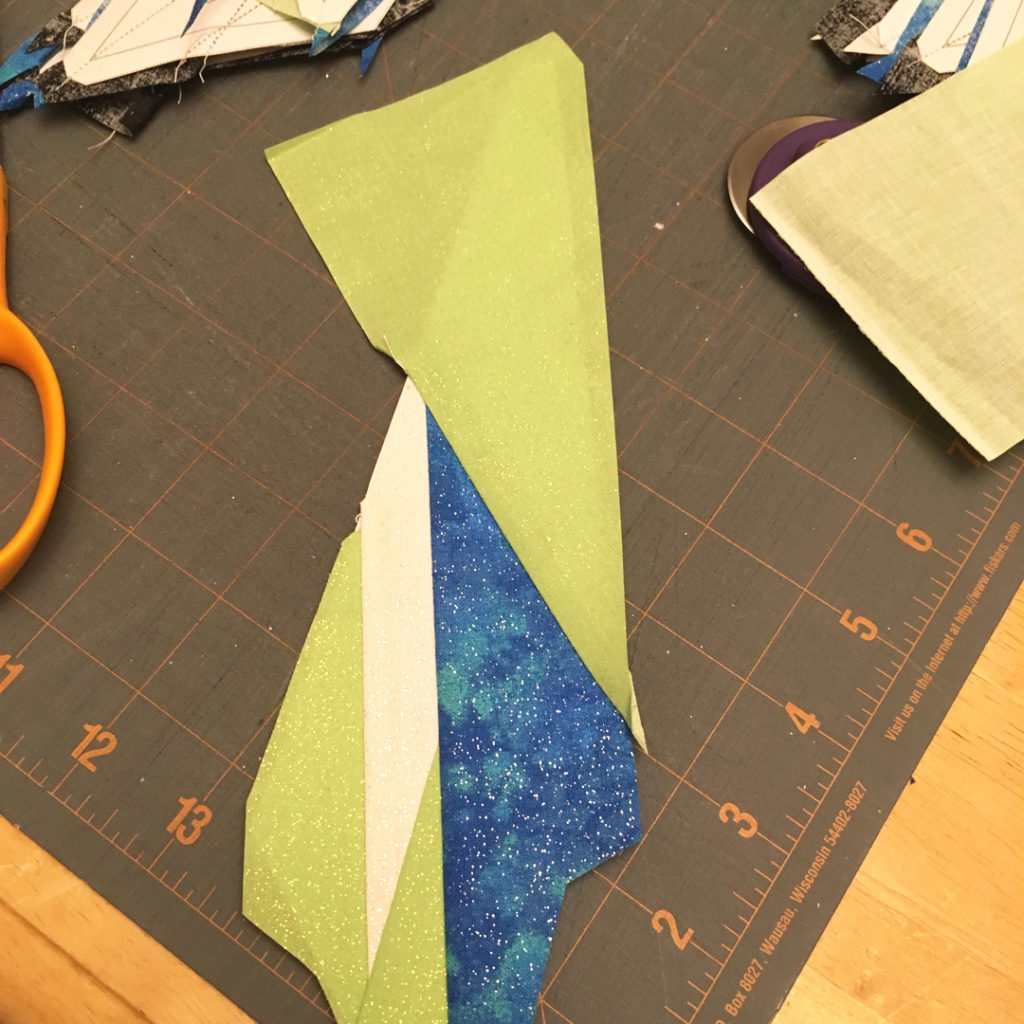
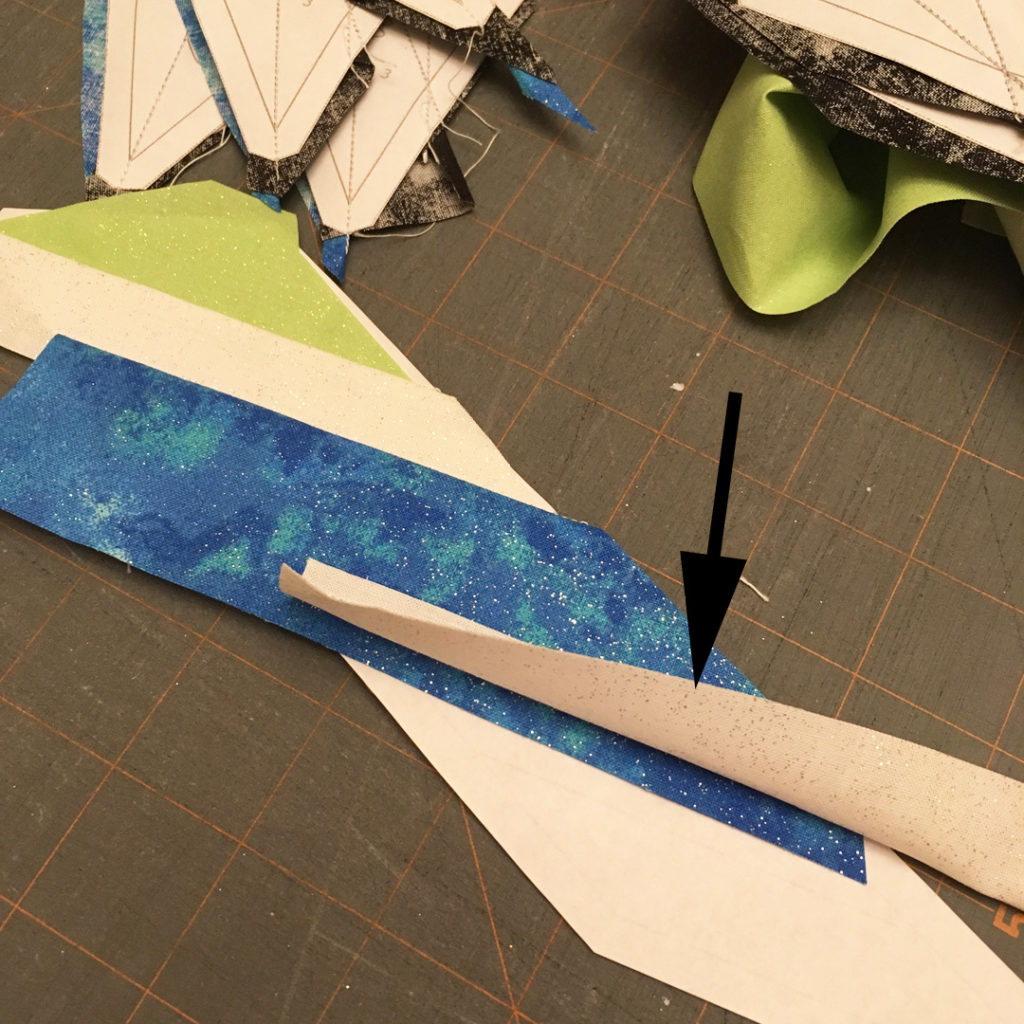
This was the first piece using a new strip so it has an extra large corner piece. I’ll trim that as well, but save it! It can be used for a smaller section if needed, or thrown into the small scrap bin and used for a collage quilt or a scrappy foundation pieced project.

The completed piece! All trimmed and ready for the ‘done’ pile!
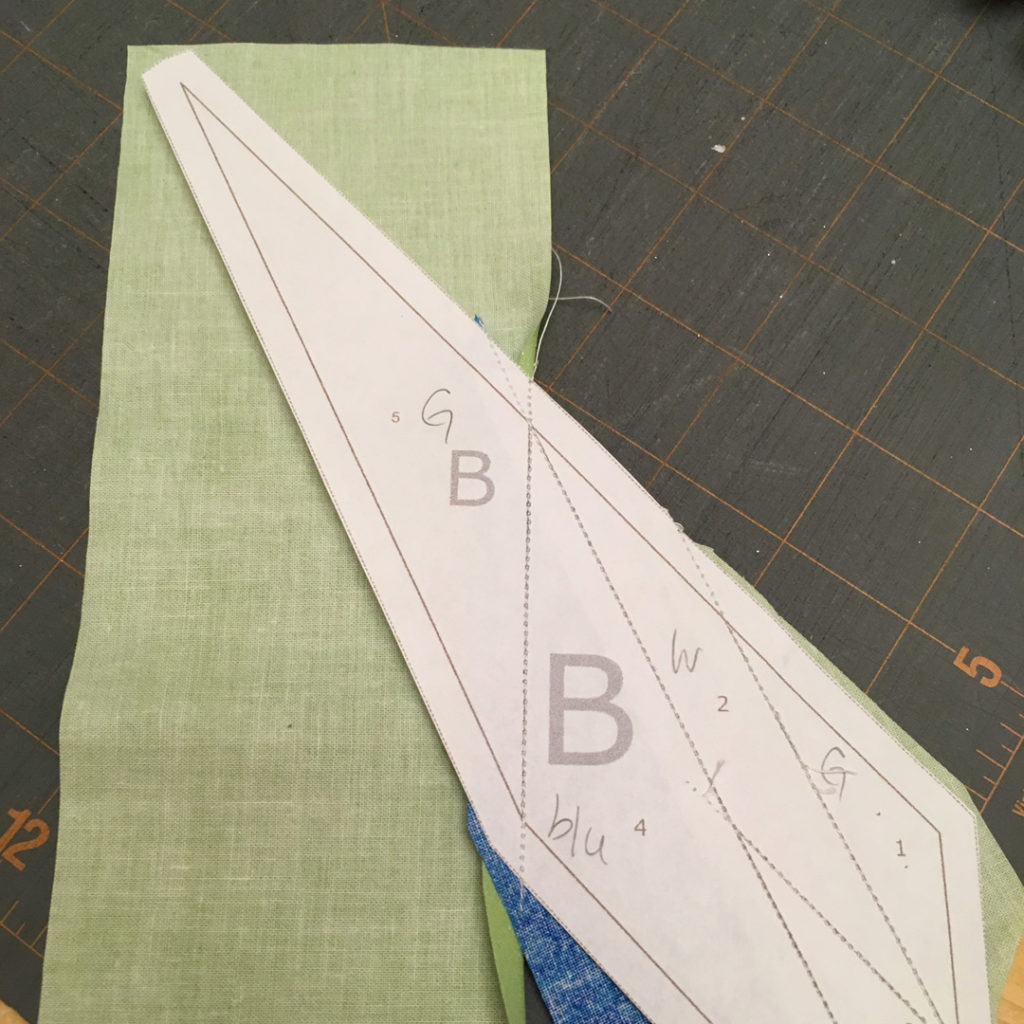
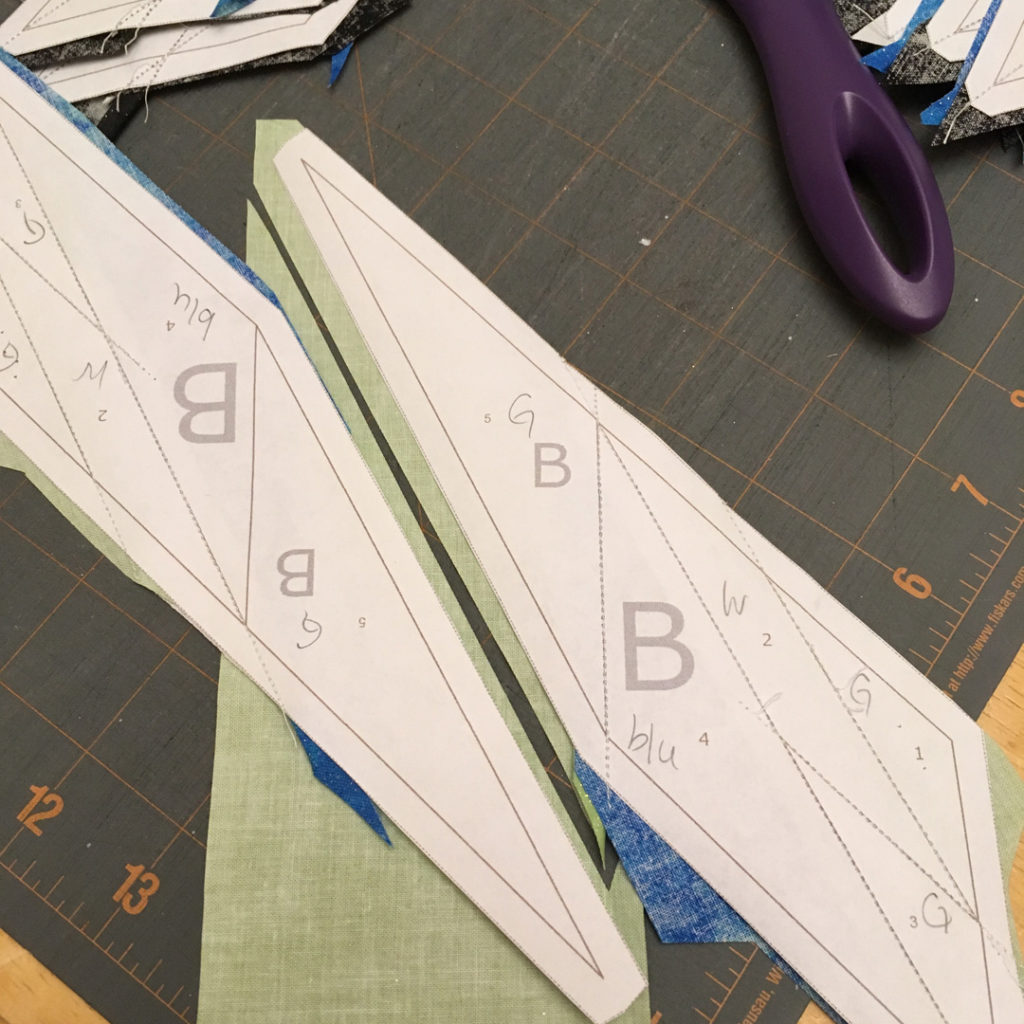
Now we move on to the next piece. The next piece lines up perfectly when flipped upside down. Notice how my ‘Bs’ are facing opposite directions. Line it up, carefully flip it over to the correct side, sew along the line.
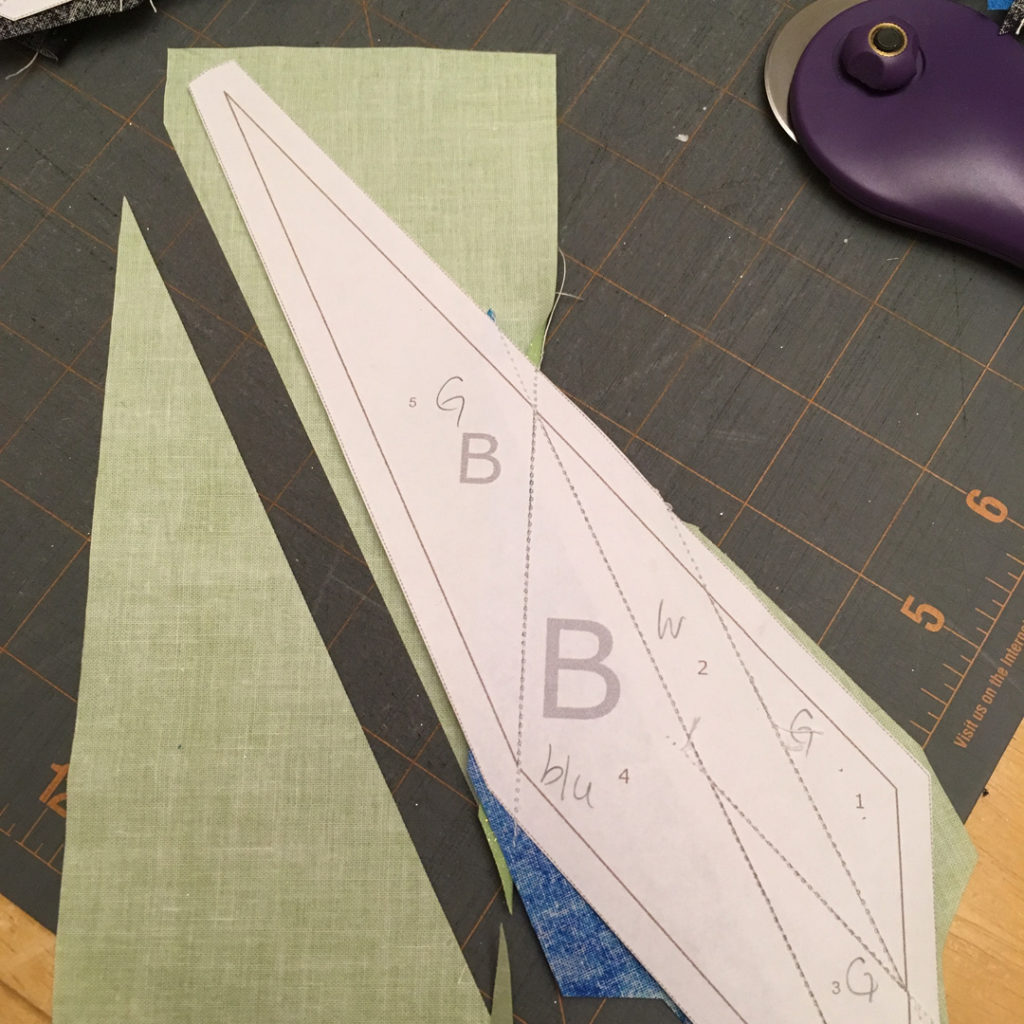
Here’s it is all sewn. Look how nicely it fits.
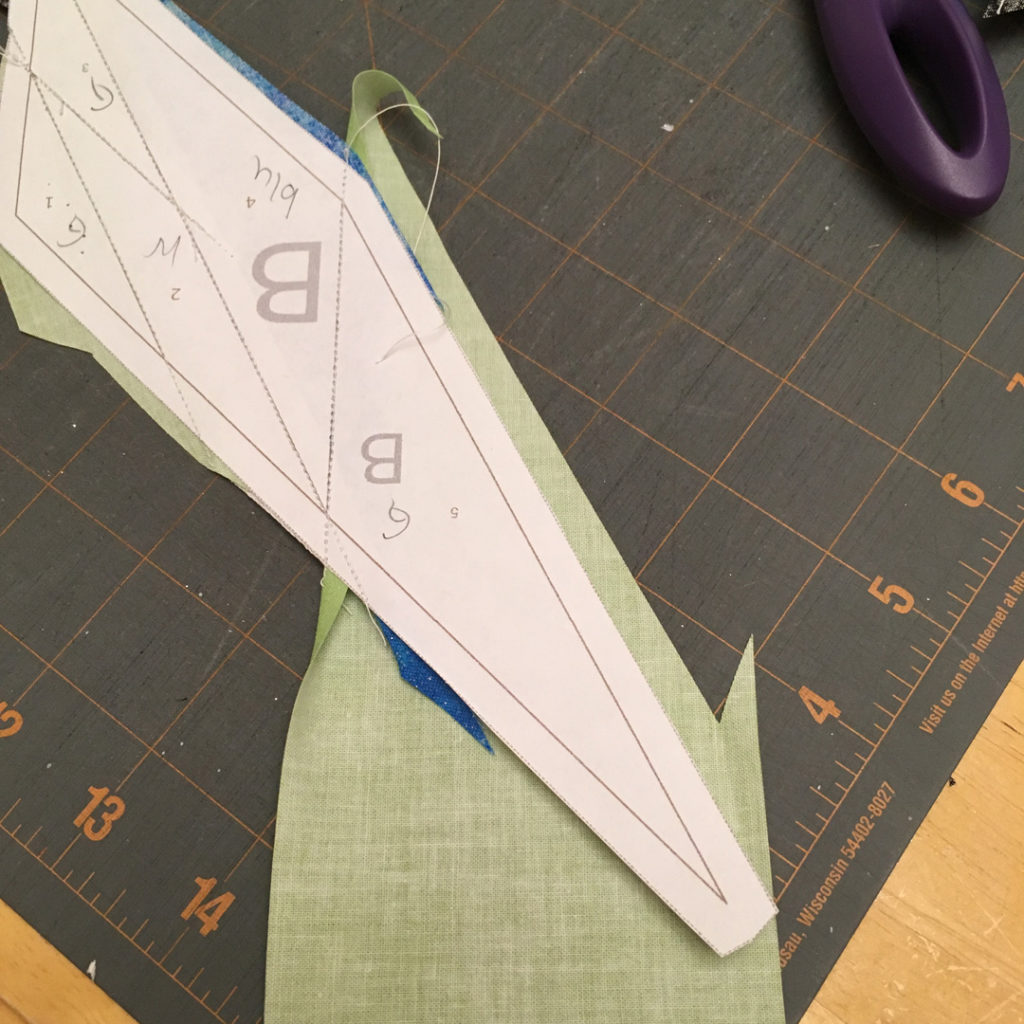
Trim and continue with more pieces!
Many times you can use the same width strip for many different sections. Just make sure that you always measure from the line you are going to sew on. Using this method gets you sewing immediately. You only need strips for sections 1 and 2 to get started! Then cut your next strip when you’re ready for section 3.
Now I said earlier that I rarely use my seam ripper for fabric not covering the section. I do use it for sewing the piece on when it’s facing the wrong way though! Sometimes I get distracted and oops! Even after much practice I still make mistakes.
I hope this has been helpful for you! I know that this method has completely changed my quilting life. You can use it for absolutely any design when foundation paper piecing. Give it a try and let me know how it goes!
Follow along on my current adventures on Instagram and Facebook @jessicaleboquilts
Happy quilting! ~Jessica
**Sincere apologies for my terribly ugly cutting mat! It is very old and has been very well loved. BUT… It’s being replaced for Christmas! Horay! (Insert super excited, cheesy grin here!)